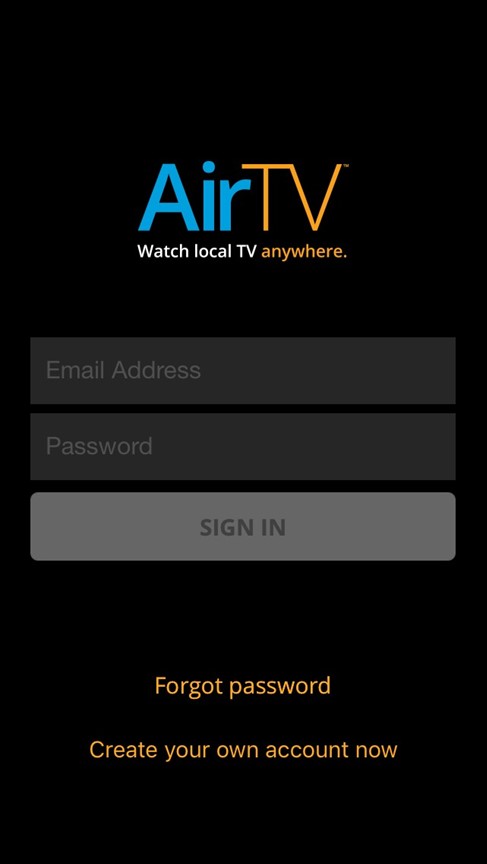
Download the AirTV App on an Android or iOS mobile device
Launch the App and select "Create your own Account"
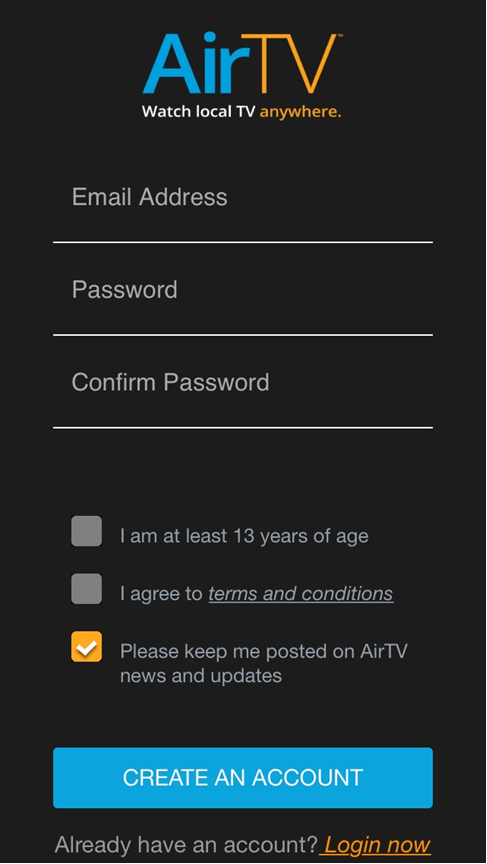
Enter the required information and select "Create an Account"
Select Okay on the confirmation screen
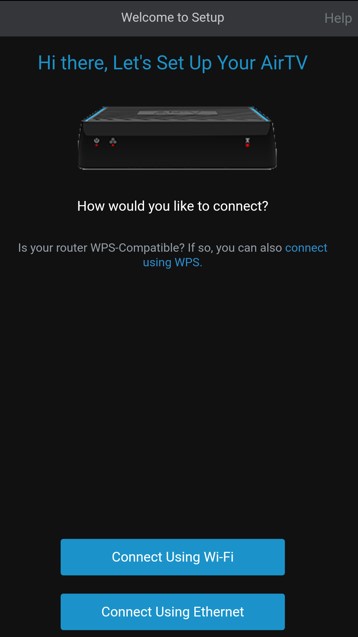
Connect New Device by selecting Begin Set-up
Choose to Connect through WiFi or Ethernet
[WiFi Tip: Easiest if phone is already connected to the WiFi network the customer wants to use as their home
setup]
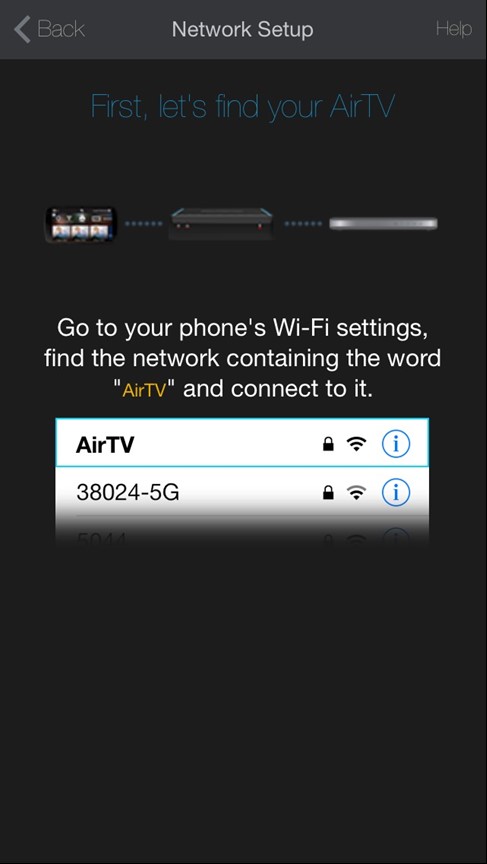
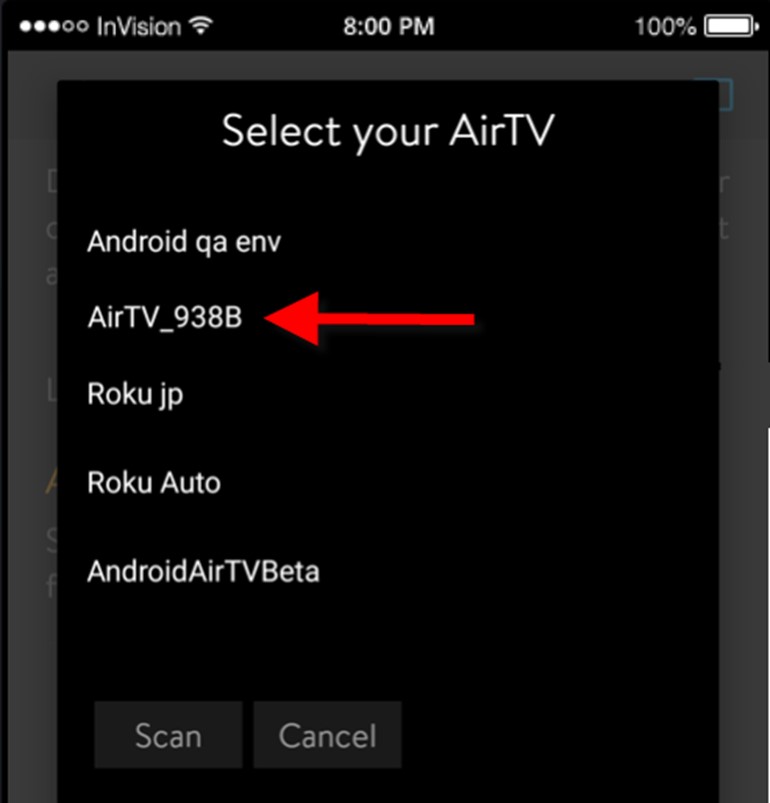
Follow on screen instructions to connect mobile device directly to the AirTV.
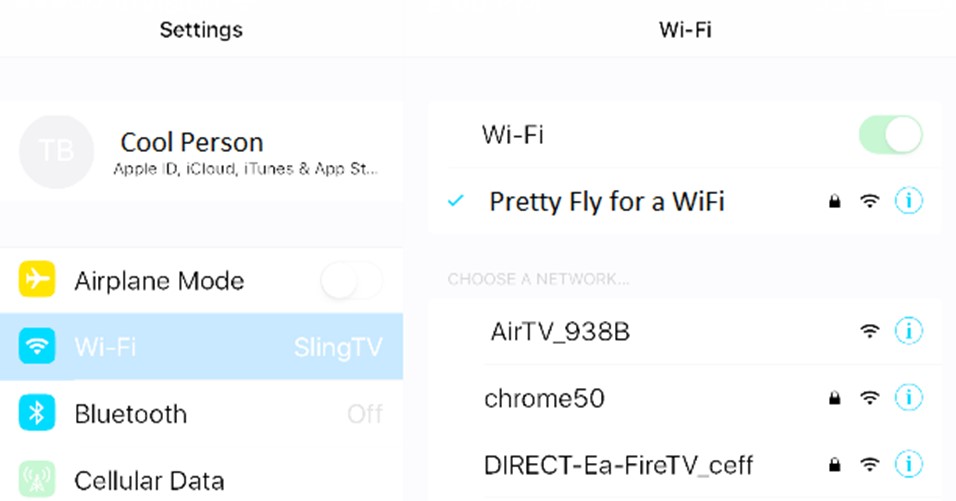
For iOS Devices this step requires going to the phones settings and selecting the AirTV Network
For android devices, the AirTV network can be selected in the AirTV App
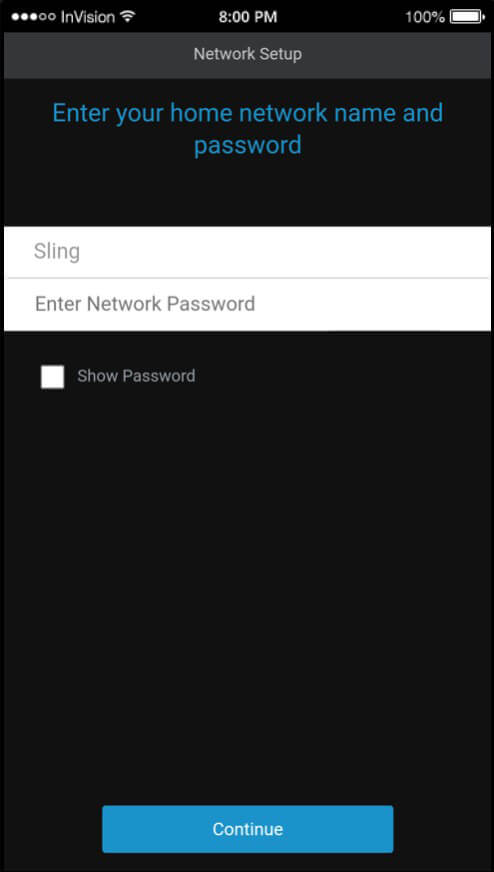
Enter your home network name and password to connect your AirTV to your home WiFi (this field will default to the
network the mobile device was previously connected to [see tip above])
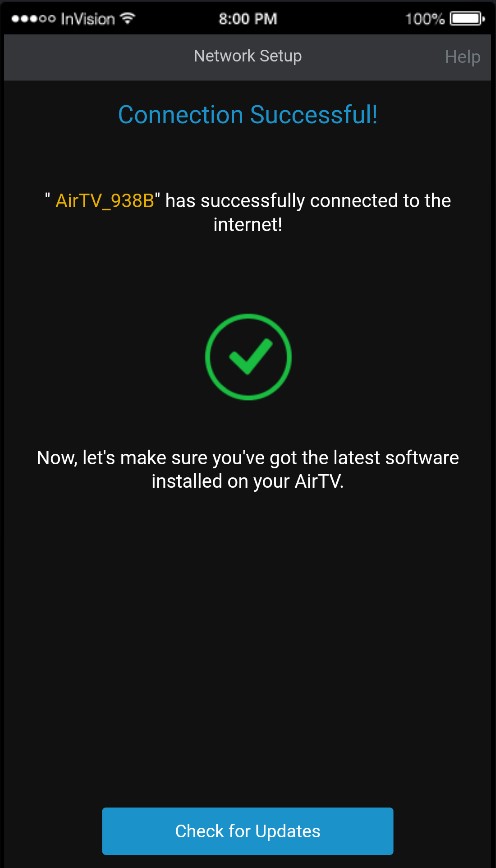
After a successful connection (green checkbox), click Check for Updates
After updates are complete/or there are no updates, message advising latest software will appear, click continue
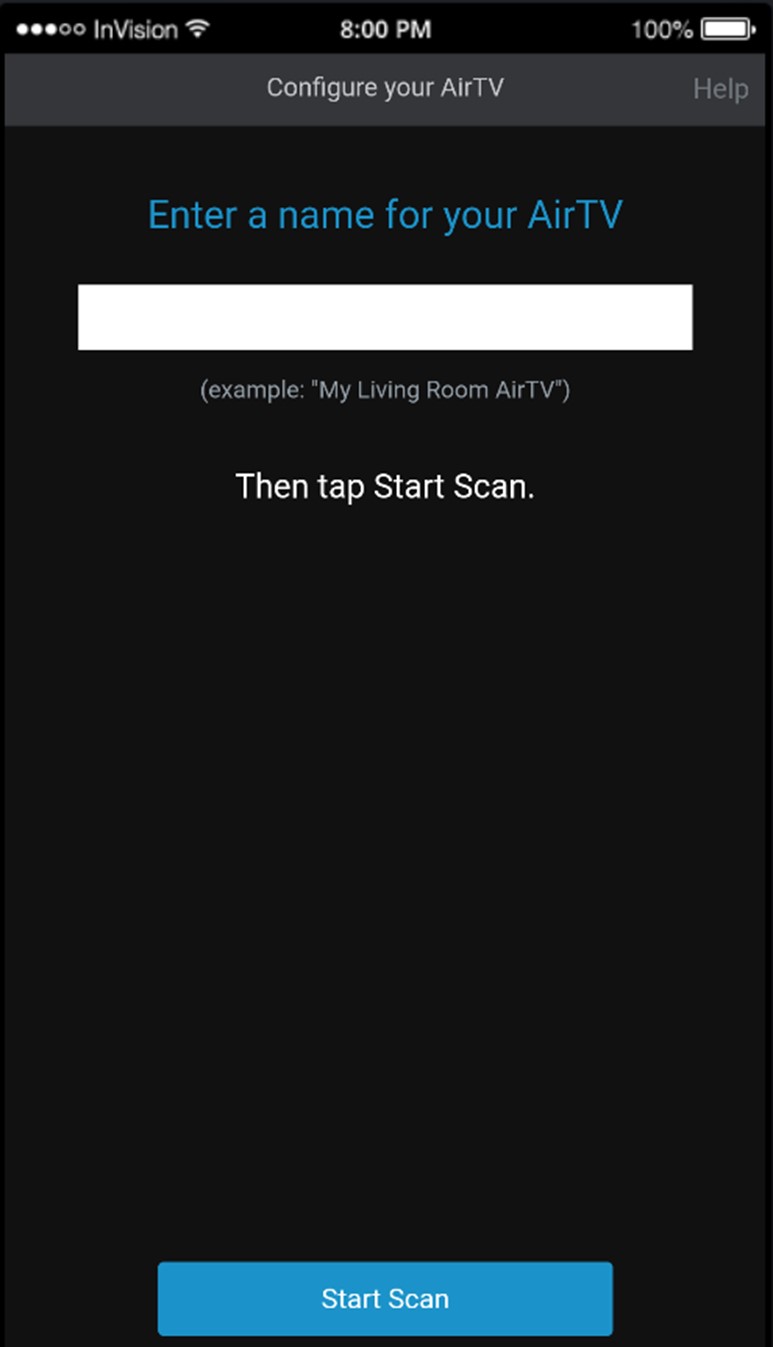
Enter a name for your AirTV (will be displayed in the App Settings), then select Start Scan.
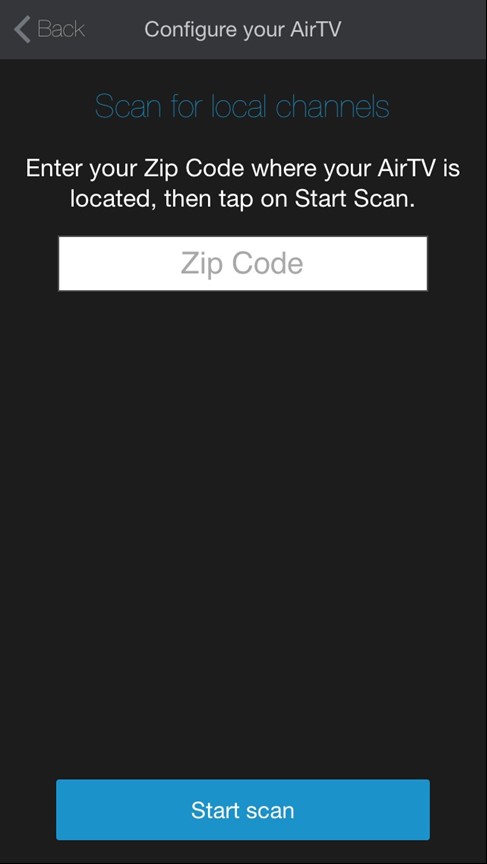
Enter the zip code the AirTV is located
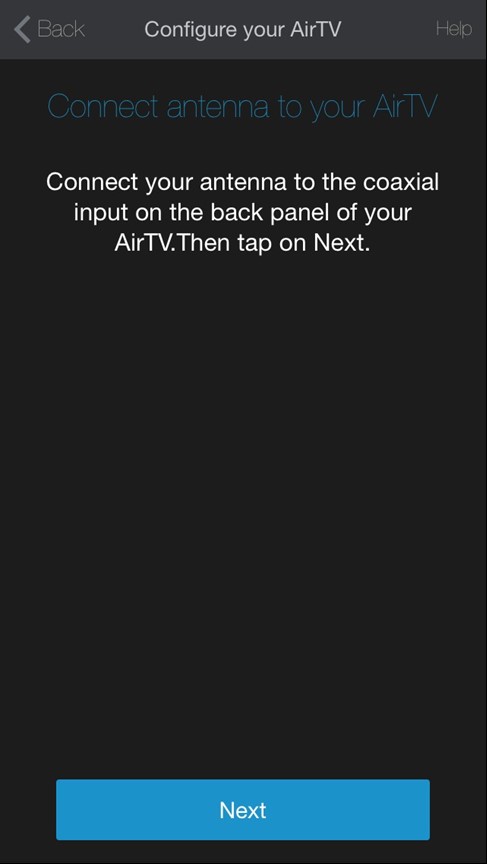
The App will remind you at this time to connect an OTA antenna. An antenna can be connected during any previous
step
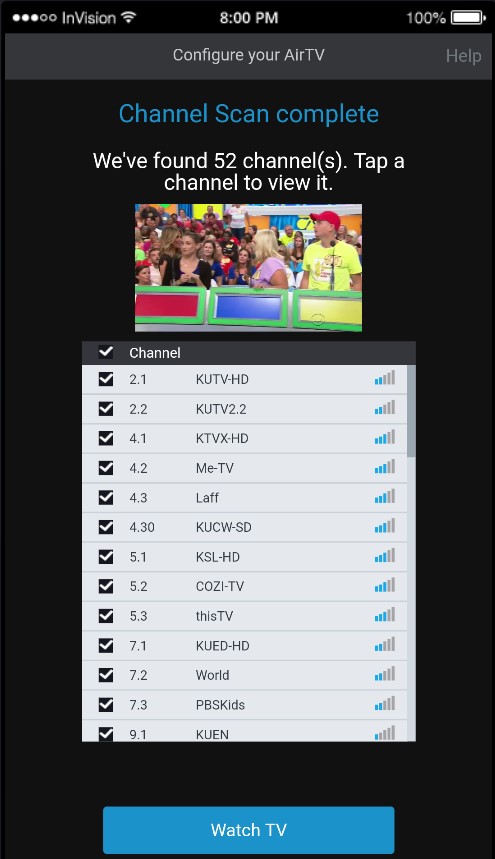
Selecting Next will initiate a channel scan
Once complete, channels will show the frequency#, channel name (e.g. KWGN-DT), and signal strength. Select Watch
TV to start watching!